
Managing a renovation timeline for a rental property in Canada comes down to seven core practices: setting clear goals, building a realistic budget, hiring qualified contractors, securing permits, notifying tenants properly, phasing the work to protect occupancy, and planning for the unexpected. Get all seven right and you protect your cash flow, your tenants, and your investment. Miss one and you risk delays, fines, or vacancies that cost far more than the renovation itself.
Here is what effective renovation management looks like in practice:
- Set renovation goals tied to property value, tenant retention, and code compliance before any contractor sets foot on site.
- Build a budget with a contingency fund. Older Canadian properties commonly reveal hidden defects once walls open, so budget 10–20% extra for time and cost overruns.
- Hire licensed, insured contractors with demonstrated experience in occupied rental renovations and, where needed, certified abatement skills.
- Pull the right permits. Structural, electrical, plumbing, and HVAC work all require municipal building permits in Ontario and most Canadian jurisdictions.
- Follow the Residential Tenancies Act (RTA). Ontario requires 120 days' notice via form N13 for any renovation that forces a tenant to vacate.
- Phase the work around natural tenant turnover wherever possible to maintain occupancy and steady rental income.
- Build contingency time into every phase, especially for older buildings where asbestos, lead, or outdated wiring can stop work entirely.
How do you set renovation goals and build a realistic timeline for Canadian rental properties?
Every successful property renovation schedule starts with a clear scope. Before you call a contractor, walk the property with a critical eye: what needs fixing for safety and code compliance, what upgrades will retain or attract tenants, and what is purely cosmetic? Separating those three categories keeps your budget focused and your timeline honest.
Prioritise upgrades that deliver measurable returns. Kitchens, bathrooms, and mechanical systems consistently rank highest for tenant retention and rental rate justification. Cosmetic work like paint and flooring can follow once the structural and system issues are resolved.
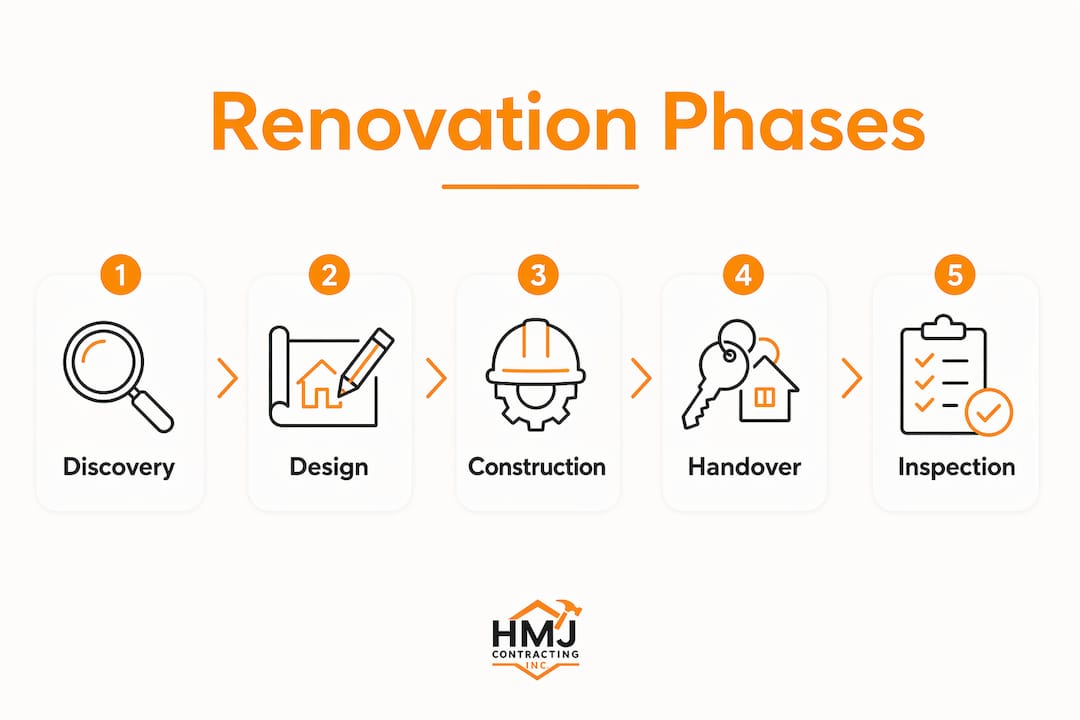
A phased renovation timeline for a Canadian rental property typically breaks into four stages:
- Discovery and planning: 2–4 weeks for site assessment, scope finalisation, and initial budget development.
- Design and permit acquisition: 3–6 weeks, accounting for municipal reviews, condo board approvals where applicable, and engineering drawings if structural changes are involved.
- Construction: 6–24 weeks depending on scale. Light commercial remodels typically run 8–12 weeks; full multi-unit projects can reach 16–24+ weeks.
- Post-construction handover: approximately 1 week for punch list completion, final inspections, and documentation.
Municipal permitting in Ontario adds real time to any project. Buffer your permit window generously, particularly during busy construction seasons in spring and fall.
| Phase | Typical Duration | Key Activities |
|---|---|---|
| Discovery and planning | 2–4 weeks | Site assessment, scope, budget estimate |
| Design and permits | 3–6 weeks | Drawings, permit submissions, board approvals |
| Construction | 6–24 weeks | Demolition, rough-ins, finishes, inspections |
| Post-construction handover | ~1 week | Punch list, walkthrough, documentation |
Pro Tip: Use your renovation budget planning process to identify which phases carry the most cost uncertainty. Older buildings almost always hide surprises in the walls.
How do you hire the right contractors for rental property renovations in Canada?
Contractor selection is where many property managers lose control of their timeline. The wrong hire means missed deadlines, poor workmanship, and potential liability. The right hire means a project that runs on schedule with clear communication at every stage.
Use this checklist when evaluating any contractor for a Canadian rental renovation:
- Valid provincial licence for the specific trades involved (general contracting, electrical, plumbing, HVAC).
- Current liability insurance and WSIB (Workplace Safety and Insurance Board) coverage to protect you from on-site injury claims.
- Certified abatement credentials if the property was built before 1990 and may contain asbestos, lead paint, or mould.
- Demonstrated experience with occupied rental renovations, including phased construction and tenant-sensitive scheduling.
- A written contract specifying scope, milestones, payment schedule, and consequences for delays.
- Verifiable references from comparable rental or commercial projects completed in Canada.
- Design-build capability, where a single team manages both design and construction, reducing miscommunication and accelerating delivery.
Hmjcontracting brings over 25 years of Ottawa-based contracting experience to residential and commercial rental projects. Their full-service renovation work includes certified asbestos, lead, and mould abatement alongside demolition and construction, which means you are not coordinating separate abatement and renovation contractors on overlapping schedules. Transparent, itemised quotes and a 5.0-star Google rating reflect the kind of accountability that keeps rental renovation timelines on track.
Pro Tip: Ask every contractor candidate how they handle a latent defect discovery mid-project. Their answer tells you more about their project management maturity than any portfolio photo.

What permits and tenant notice rules apply to rental renovations in Ontario?
Permit and notice requirements are the two most common sources of preventable delays in Canadian rental renovations. Getting ahead of both is the difference between a project that runs on schedule and one that stalls for weeks.
Building permits are required in Ontario for any work that touches the building's structure or safety systems. That includes:
- Adding or removing walls, beams, or load-bearing elements
- Changes to plumbing or drainage
- HVAC installation or modification
- Electrical panel upgrades or new circuits
- Window and door opening alterations
- Foundation work or additions
Cosmetic updates like painting, flooring replacement, or fixture swaps generally do not require a permit, but confirm with your municipality before assuming.
Tenant notification under Ontario's Residential Tenancies Act depends on the scope of work. For standard maintenance entry, landlords must provide 24 hours' written notice specifying the date, time, and reason. For major renovations that require the unit to be vacant, the process is significantly more involved.
Key legal requirement: Ontario's RTA mandates a minimum of 120 days' notice using form N13 before a tenant must vacate for renovations. The tenant also retains the right of first refusal to re-occupy the unit at the same rent once work is complete.
Compensation rules apply when vacancy is required. For properties with five or more residential units, landlords must pay three months' rent as displacement compensation. For properties with fewer than five units, the requirement is one month's rent or an equivalent alternative unit.
Municipalities like Toronto and Hamilton have added local bylaws on top of provincial rules, sometimes requiring a specific renovation licence before an N13 can even be issued. Check with your local municipal office before serving any notice.
Hmjcontracting's team understands these compliance requirements and builds them into project scheduling from day one, including abatement sequencing before permit applications where hazardous materials are involved.
How do you keep tenants informed and reduce disruption during renovations?
Tenant communication is not a courtesy. It directly affects occupancy rates, lease renewals, and your legal standing under the RTA. Property managers who handle communication well rarely lose tenants during renovations; those who do not often face vacancies that cost more than the project itself.
Start with a written schedule delivered at least two to three weeks before work begins. That schedule should include:
- Daily working hours and which areas will be affected each day
- Expected noise levels and types of work (demolition, drilling, painting)
- Dust control and site isolation measures in place
- Emergency contact information for the site supervisor
- Planned access restrictions to common areas or amenities
Phasing construction around tenant turnover is the most effective way to reduce disruption in multi-unit buildings. Renovate vacant units first, then move tenants into completed units before continuing work in the remaining spaces. This approach maintains occupancy and avoids the legal and financial complexity of temporary relocations.
Where disruption is unavoidable, offer practical accommodations. Temporary kitchen alternatives during a kitchen renovation, adjusted rent during a period of significant inconvenience, and regular progress updates all build goodwill and reduce the risk of formal complaints to the Landlord and Tenant Board.

Typical renovation phases for Canadian rental properties: timelines, risks, and expert guidance
Understanding each phase of a property rehab project timeline helps you anticipate bottlenecks before they become crises. Here is how the phases break down in practice, with the risks that most commonly derail each one.
Phase 1: Discovery and planning (2–4 weeks)
This phase includes the site assessment, hazardous material screening, scope finalisation, and initial stakeholder engagement. The pre-permit discovery window, typically 1–3 weeks, is where municipal inquiries, condo board reviews, and asbestos or lead assessments happen. Skipping or rushing this phase is the single most common cause of mid-project surprises.
Phase 2: Design and permit acquisition (3–6 weeks)
Pre-permit bottlenecks are a leading cause of project delays. For large or complex projects, a pre-permit window of up to 8–14 weeks may be required before you can start design and permit acquisition, particularly when municipal reviews and board approvals are involved. The critical decisions affecting cost and schedule are made in the first 30–60 days after project initiation. Engage your contractor and designer simultaneously during this phase rather than sequentially.
Phase 3: Construction (6–24 weeks)
Demolition comes first, followed by structural framing, rough-in electrical and plumbing, HVAC, insulation, drywall, and finishes. Structural and system repairs must precede cosmetic work. Jumping to finishes before resolving mechanical or structural deficiencies means reopening completed areas later, which is one of the most expensive mistakes in rental property renovation.
Phase 4: Post-construction handover (~1 week)
The renovation project handover checklist for this phase covers punch list completion, deep cleaning, final municipal inspection, and documentation transfer including warranties, manuals, and permit sign-offs. A thorough walkthrough with the contractor before releasing final payment protects you from discovering deficiencies after the crew has left.
| Risk | Phase | Mitigation |
|---|---|---|
| Latent defects (asbestos, wiring) | Discovery | Pre-demolition hazmat assessment |
| Permit delays | Design | Submit early; buffer 8–14 weeks |
| Scope creep | Construction | Fixed-scope contract with change order process |
| Deficiency disputes | Handover | Itemised punch list before final payment |
Pro Tip: Always resolve structural and system deficiencies before any cosmetic finishes. Reopening finished walls to fix plumbing or electrical adds both cost and weeks to your schedule.
A 10–20% contingency buffer for both time and cost is standard practice for older Canadian rental properties. Budget it from the start rather than scrambling for it mid-project.
How does a renovation affect your property management operations?
Renovation work touches nearly every operational aspect of a rental property, and property managers who plan for those impacts avoid the most costly surprises.
Rent adjustments are sometimes legally required and always worth considering strategically. Under the Ontario RTA, tenants displaced by major renovations are entitled to compensation, as outlined in the permit and notice section above. For occupied units where disruption is significant but relocation is not required, offering a temporary rent reduction builds goodwill and reduces the risk of formal complaints.
Lease clauses matter more than most property managers realise. If a renovation is planned within the term of an existing lease, review the lease for any clauses governing access, alterations, or disruption. For new leases signed before a planned renovation, include clear language about the scope, timing, and tenant obligations during construction. Consult a real estate lawyer familiar with the RTA before drafting or amending any clause related to renovation access.
Cash flow planning during a renovation requires accounting for potential vacancy, reduced rent periods, and the carrying costs of the project itself. A clear renovation scope of work defined before construction begins gives you the most accurate picture of how long income may be reduced and by how much.
How do you coordinate multiple renovation projects across a rental portfolio?
Scheduling several renovation projects simultaneously across a portfolio is a different challenge from managing a single unit. The core discipline is sequencing, not speed.
Start by mapping all planned renovations against natural vacancy windows. Units coming up for lease renewal or turnover are the lowest-friction entry points for major work. Renovating vacant units first, then moving tenants into completed units to free up the next phase, keeps the portfolio occupied and generating income throughout the programme.
Standardise your materials and design selections across units where possible. Using the same flooring, cabinet line, and fixture specifications across multiple units reduces procurement lead times, simplifies contractor scheduling, and makes future repairs easier to match. A multi-unit renovation plan built around standardised specifications also gives you more leverage when negotiating contractor pricing on volume.
Assign a single point of contact for each active project, whether that is an in-house property manager or a general contractor with project management responsibility. Overlapping projects with no clear ownership create communication gaps that compound into delays. For portfolios with three or more concurrent renovations, a shared project tracking tool that logs milestones, permit status, and contractor schedules is worth the setup time.
Post-renovation inspection and quality assurance
The final walkthrough is not a formality. It is your last opportunity to identify deficiencies before releasing the contractor's final payment and before a new tenant takes possession.
Work from a written renovation project handover checklist that covers every trade involved in the project. A thorough checklist for a residential rental renovation includes:
- Structural and framing sign-off from the municipal inspector
- Electrical panel labelling and outlet testing
- Plumbing pressure test and fixture operation
- HVAC filter installation and system test
- Paint finish quality and touch-up completion
- Flooring installation and transition strip placement
- Door and window operation, weatherstripping, and locking hardware
- Appliance installation and function test
- Smoke and carbon monoxide detector placement and testing
- Final permit sign-off and documentation package
Document every deficiency in writing with photographs before the contractor leaves the site. A clear punch list with a deadline for corrections protects you legally and gives the contractor a defined scope for their return visit.
After the contractor's work is accepted, conduct a separate pre-tenancy inspection to establish the unit's condition on record. This baseline protects you in any future dispute about damage versus normal wear.
Key takeaways
A well-managed renovation timeline for Canadian rental properties depends on early planning, legal compliance, and phased execution that protects both occupancy and cash flow.
| Point | Details |
|---|---|
| Phase your timeline realistically | Canadian rental renovations run 2–4 weeks planning, 3–6 weeks permitting, 6–24 weeks construction, and ~1 week handover. |
| Budget a contingency from day one | Older properties require an additional buffer for time and cost to cover latent defects found during demolition. |
| Follow Ontario RTA notice rules | Major renovations requiring vacancy need several months' notice via form N13 before the tenancy termination date. |
| Resolve structure before finishes | Fixing mechanical and structural deficiencies first prevents costly rework and tenant disruption later. |
| Use a written handover checklist | A complete renovation project handover checklist before final payment protects you from post-project deficiency disputes. |
Ready to plan your next Ottawa rental renovation?

Hmjcontracting has delivered residential and commercial renovations across Ottawa for over 25 years, with certified abatement, demolition, and full-service construction under one roof. Whether you are planning a single-unit refresh or a multi-building rehab, the team provides transparent, itemised quotes and a clear project schedule from the first consultation. Explore Hmjcontracting's renovation services in Ottawa or contact the team directly for a free quote.